OK I think I have covered everything, well most of it. Might have missed a few items, but it'll be covered along the way. The journey is still long. Well some said it never ends. There is always something to be modded. Well it's true.
At the time of the engine completion, the Goldmember chasis is not around yet. So I had to use my daily ride, a Honda Civic EK3, as the test bench of this engine. Here's what it looks like in its engine bay.
To ignite the Air and Fuel, I opted for the MSD Ignition system. I hope to be able to eliminate one of Honda most problematic area, it's "fragile" distributor. There have been so many cases of distributor failure in Honda's B-series engine, during races and even during daily commute to work. The stock distributor just can't cope with the frequent high revving engine, so either its coil or ignitor would just give way without a warning. I managed to get a used MSD 6AL Ignition Box (the now discontinued P/N 6420) at a cheap price to amplify the ignition spark. Then I get it to work with an MSD SS Coil (P/N 8207) to replace the stock internal coil, together with MSD 8.5mm Super Conductor plug cables, then the MSD Distributor cap (P/N 82921) which comes with an additional tower for connecting to the external coil. Here's where I had them installed in the engine bay.
Passenger side view of the engine bay. Note the clearance provided by the FAL Radiator fan.
To ease up the crankcase pressure, I replaced the stock breather box with the unit produced by Endyn Engineering, which has a feedback pipe to feed the captured engine oil back into circulation in the engine block.
A smaller breather filter is added to release the head pressure and deal with the blow-by, not very effective I must say, but it'll do for now. In the future, I will be adding another one of those Endyn's Breather Tank just for the head cover..
Another view of the Breather Tank, MSD distributor cap and the AEM Cold Air Intake pipe.
The cold air is delivered by the AEM Cold Air Intake through its pipe that goes all the way down to the driver side's front bumper.
I drilled a hole in the bumper to help channel the rushing air to the AEM air filter in the bumper. During race, I remove the air filter altogether and replaced it with a Blox Racing Velocity Stack.
The exhaust gas is extracted from the engine through a J's Racing 4-2-1 header. I was still researching for a US-made header at that moment. More on this later.
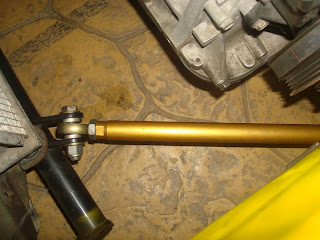
A set of Full Race ProStreet Traction bars helps plant the tires to the road to avoid wheel hop during high rpm launch.
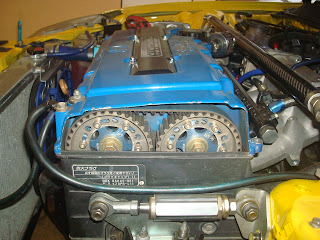
The cams are being set to its specified centerline. Any advancing and/or retarding of the individual cams will be done on the dyno, if necessary.
I added an Ingalls Engine Torque Damper, to help reduce the engine movement in high acceleration, hence reducing the wear on the engine mounts.
Final views of the completed engine bay.
Now, it's time to hit the dyno!


Nice post having so good contents to understand. Good Post!
ReplyDeletehigh quality valves