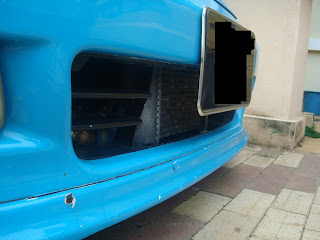
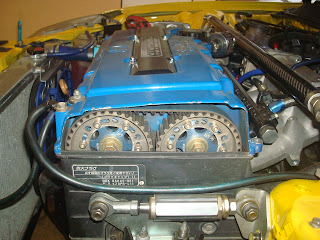
So at the conclusion of SDB Round 2 of 2009, I bought this 1992 2-door Civic EH2 (local version of JDM's Honda EG) at a price of RM21,000.00. It was Blue in color, with SOHC engine and bolt-on tiny turbo system. The color was somewhat unusual locally, I have no idea what is is called. Here's what it looked like the first day I brought it home.
So I drove this car around with this color and this turbo engine for a while, like for about 3 months. Didn't quite excite me though.
In the meantime, I race my EK again in SDB Round 3 in July of 2009.
With some friends at the pitt.
Here's the owner of the fast Civic Si, Mr Poji.
Busy traffic at the pitt exit.
View from the starting line, waiting for our turn to run.
Ok now it's my turn to race.
In the end, I ended up doing worse from the previous round. The best time for this round was 15.879s. Last time I managed to clock 15.735s. It was high time to start transfering this engine into the GoldMember.
The GoldMember Chronicles
This is my journal on the build up of my Honda drag car. It serves to remind myself on how much time and effort (money too!) that have been poured into the build up. Perhaps it may also provide some good information to other fellow enthusiasts who have the same interest.
Thursday, 29 March 2012
Let's race it again
And here I was again, in Round 2 of the Sepang Drag Battle 2009. Not much changes was done to the car. Except perhaps some fine tuning on the Hondata, which I was learning to do it by myself as well. Hopefully in the future, I could reduce my dependency to my friend Zaki for tuning help and do it myself, without blowing the engine in the process, of course. Well, in the course of learning, one will have to accept some failures, including killing a few engines in the process. I just hope it won't happen too fast though!
Here's me doing some final touches before the race starts.
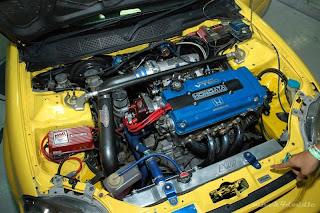
Everything in the engine bay remained the same.
So was the car.
And here's the result (see car no. 26). I had managed to improve the timing from 17.048s to 15.735s this time. But it was still way too slow to catch up with the rest of the guys. Hence this was when I decided to look for a lighter chasis. It was then the true birth of the GoldMember as it is now.
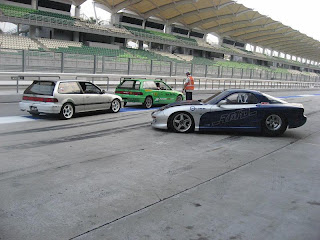
Here are some other cars at the race, from various categories.
Let's race it
So with all done (hopefully!), now it's time to test the machine on track. I brought the car with this engine to participate in Class F (Road Legal Category) at Round 1 of the Sepang Drag Battle 2009. I didn't expect to win or even qualify for quarter final round with this car, since the competition includes many smaller and lighter cars with more engine power. I would just be happy if it can just survive the race, so that I can drive it home after the race, and bring me to work on Monday.
So here it is at the pit.
And here's how it did on track.
Here's a friend's car, which is using a DOHC non-VTEC Si engine, which was way faster than mine. Much better power-to-weight ratio perhaps. Plus the driver is a much more experienced drag racer than I am. It's a nice classic civic very well maintained and restored nonetheless.
Tuesday, 27 December 2011
The Dyno Tuning
The engine went through several session of dyno tunings. This was off course done after the engine has been broken-in for approximately 1000km. There are multiple methods of engine break-in out there, each of them has its pros and cons. Since I was not really in a hurry, so I had chosen the conventional way of the 1000km road travel.
And it went through several sessions of dyno tuning, since every time there are more adjustments to be made, some tweaking here and there, and due to availability of the dyno machine, the sessions had to be carried out in different locations each time, but all the machines are the same (DynoJet), so the results are hopefully consistent.
Here's the car all strapped up on a dyno in a workshop somewhere in Damansara area (can't remember the exact name of the place).
Final checks on the engine before starting the run.
And this my my good friend Zaki, who helped me on the tuning. He had also given me many tuning lessons on Crome and Hondata. He is certainly a very good tuner and is willing to share his knowledge and experience to most of us, so he is highly recommended for tuning solution.
As I mentioned earlier, the engine went through several dyno tuning sessions. So I'm kind of lost track as to when, where and which dyno sheet associated with the session, so I'm just going to post all of them here.
Thursday, 20 October 2011
Now's Let's Put All the Stuffs Together.....
OK I think I have covered everything, well most of it. Might have missed a few items, but it'll be covered along the way. The journey is still long. Well some said it never ends. There is always something to be modded. Well it's true.
At the time of the engine completion, the Goldmember chasis is not around yet. So I had to use my daily ride, a Honda Civic EK3, as the test bench of this engine. Here's what it looks like in its engine bay.
To ignite the Air and Fuel, I opted for the MSD Ignition system. I hope to be able to eliminate one of Honda most problematic area, it's "fragile" distributor. There have been so many cases of distributor failure in Honda's B-series engine, during races and even during daily commute to work. The stock distributor just can't cope with the frequent high revving engine, so either its coil or ignitor would just give way without a warning. I managed to get a used MSD 6AL Ignition Box (the now discontinued P/N 6420) at a cheap price to amplify the ignition spark. Then I get it to work with an MSD SS Coil (P/N 8207) to replace the stock internal coil, together with MSD 8.5mm Super Conductor plug cables, then the MSD Distributor cap (P/N 82921) which comes with an additional tower for connecting to the external coil. Here's where I had them installed in the engine bay.
Passenger side view of the engine bay. Note the clearance provided by the FAL Radiator fan.
To ease up the crankcase pressure, I replaced the stock breather box with the unit produced by Endyn Engineering, which has a feedback pipe to feed the captured engine oil back into circulation in the engine block.
A smaller breather filter is added to release the head pressure and deal with the blow-by, not very effective I must say, but it'll do for now. In the future, I will be adding another one of those Endyn's Breather Tank just for the head cover..
Another view of the Breather Tank, MSD distributor cap and the AEM Cold Air Intake pipe.
The cold air is delivered by the AEM Cold Air Intake through its pipe that goes all the way down to the driver side's front bumper.
I drilled a hole in the bumper to help channel the rushing air to the AEM air filter in the bumper. During race, I remove the air filter altogether and replaced it with a Blox Racing Velocity Stack.
The exhaust gas is extracted from the engine through a J's Racing 4-2-1 header. I was still researching for a US-made header at that moment. More on this later.
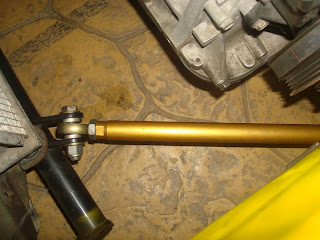
A set of Full Race ProStreet Traction bars helps plant the tires to the road to avoid wheel hop during high rpm launch.
The cams are being set to its specified centerline. Any advancing and/or retarding of the individual cams will be done on the dyno, if necessary.
I added an Ingalls Engine Torque Damper, to help reduce the engine movement in high acceleration, hence reducing the wear on the engine mounts.
Final views of the completed engine bay.
Now, it's time to hit the dyno!
Subscribe to:
Posts (Atom)

